Learn how to take screen shots of your screen saver in action in this easy Mac OS X tutorial.
In Mac OS X, there’s a very easy way to take a screen shot of your screen saver in action. It’s not very obvious how to do it, but it’s actually very easy to accomplish. This can be useful if you see something you like on your screen saver and wish to have a screen shot of it for use as an independent image or picture file.
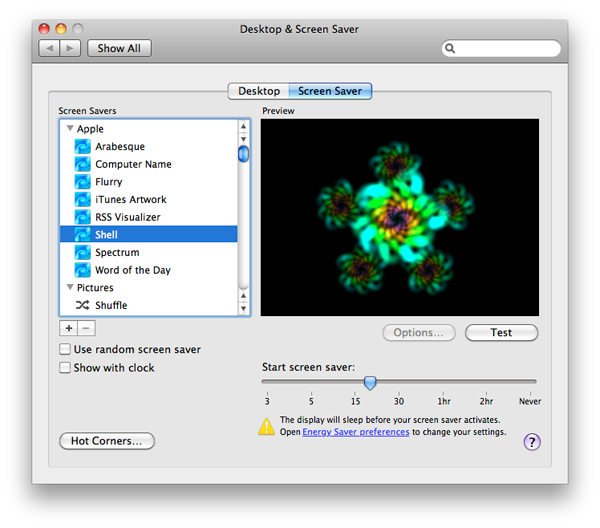
Open the System Preferences and navigate your way to the Screen Saver portion of the Desktop & Screen Saver Pane as shown below. Make sure the screen saver you want to take a screen shot of is selected in the column on the left.
 Step 2:
Hold down the Shift and Command keys together and continue to hold them down until you are done taking your screen shots. With the keys still held, click on the Test button in the preferences pane with the mouse. Continue to hold the Shift and Command keys while the screen saver starts up.
When the animation in the screen saver (if any) reaches the point where you want to take a screen shot, just press the 3 key while still hold the Shift and Command keys. This will take a screen shot of the entire screen at that point in time. If you want to take multiple screen shots of the screen saver in action at different points of its animation, then continue to hold the Shift and Command keys and press the 3 key to take each screen shot. When you’re done taking screen shots, just let go of the Shift and Command keys and this will cause the screen saver to exit.
The screen shots taken with the above steps will be saved on the Desktop with file names beginning with “screen-shot”. Here’s an example of one I took:

That’s all there is to it. I hope you enjoyed this Mac OS X tutorial and how-to tip.
Category: Apple Mac OS X